The BIGGEST factor in lowering your scores is getting more distance off the tee! Why? Because the average golfer cannot hit long irons or hybrids into the green with any accuracy or consistency. So, the shorter the distance to the green, the better your chances of scoring!
We have three new TrackMan 4 units available for your practice sessions! Here are some tips on using TrackMan to practice for more distance:
Key TrackMan measurements for achieving more Distance: (Learn More)
- Ball Speed – The speed at which the ball is traveling after it leaves the clubface
- Smash Factor – The efficiency of energy transfer from the clubhead to the ball
- Dynamic Loft – The horizontal angle at which the ball leaves the clubface. A simple explanation is the combination of the loft of the club and attack angle.
- Attack Angle – the horizontal angle at which the clubface is moving up or down at impact.
- Spin Rate – The amount of spin on the ball immediately after impact.
Notice that I did NOT mention clubhead speed! For now, I want you to concentrate on what factors you need to change, given that we are not intentionally trying to increase clubhead speed!
These five measurements are the most important in helping you develop more distance…and they are somewhat inter-related. In general, golfers should be looking for high launch and low spin in order to maximize distance. As we will show you, optimizing these factors can give you 6 to 24 more yards in total distance!
Schedule Your Driver Fitting Today!
The first two measurements to look at are Attack Angle and Smash Factor.
Attack Angle:
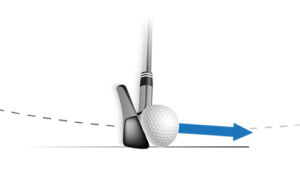
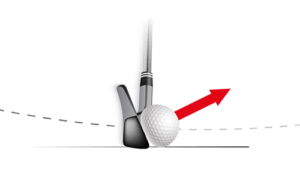
This is the angle that your club is either moving up (positive attack angle) or down (negative attack angle) at impact. We have been taught forever that hitting down on the ball is a good thing! Well, it is for almost every club except the driver. With a driver, a neutral to positive attack angle creates low(er) spin which results in more carry distance and roll. So if your Attack Angle is negative, you should work on improving that through a couple of simple tips (Learn More). And, since Attack Angle can be dramatically influenced by the shaft tip stiffness and your swing dynamics, you should go through a proper fitting to see if we can help even more with the correct shaft. (Learn More).
Smash Factor
Smash Factor is simply the efficiency of how much Ball Speed you are getting for your Club Speed. This is calculated by dividing Ball Speed by Club Speed. So, a 150 mph Ball Speed with a 100 mph Club Speed would give you a Smash Factor of 1.50. This is typically the highest Smash Factor available, unless the club head or ball is non-conforming! The three factors that can impact Smash Factor are 1) Centeredness of impact on the clubface, 2) Face material/design, and 3) Shaft strength and tip design. Unless you have been through a high tech fitting I suggest you concentrate on Centeredness of impact during your practice. You can use TrackMan to show you Impact Location or you can use impact tape on the face of the club.
In general if you are hitting on the heel of the club, low or high on the face, your smash factor with a driver can be as low as 1.36. If you pop your Smash Factor up to 1.46 from 1.36, you can gain 10 to 16 yards, depending upon your club speed. (Learn More). Typical fitting reasons for poor Smash Factor are clubs that are too long (hitting on the heel), shafts that are too whippy, and incorrect loft of the club.
Dynamic Loft
A couple of more observations. If you think you are hitting the ball too high and getting no roll, it could be a combination of a positive attack angle and too much loft on your club…this is Dynamic Loft. If it is too high, you will get very little roll because the spin is too low and landing angle is too high. As an example, if you are swinging up on the ball +3 degrees and are playing a 10.5 degree driver, you could easily have too much Dynamic Loft. On the other hand, if you are swing down on the ball, say -3 degrees, and are playing a 10.5 degree driver, you could be hitting low bullets. A lot of the Dynamic Loft also has to do with Impact Location on the clubface. If you are swinging down on the ball and impact is on the top of the clubface, you will increase your launch angle (think pop fly). On the other hand, if you are swinging up on the ball and hitting on the bottom of the clubface, you will hit a low shot.
Impact Location Affect on Ball Speed and Spin
When you do not hit the center of the clubface, you can dramatically reduce Ball Speed and increase Spin. Both of these can reduce your distance significantly. Heel shots are the worst….increases spin and reduces ball speed the most. Toe and top of the club impact are second in terms of increasing spin and reducing ball speed.
Ideal TrackMan Numbers for Optimizing Distance
TrackMan has an Optimizer feature that can really help you understand just how much distance you can gain by optimizing these factors. We can show you how to use the Optimizer during your practice session.
Here are some numbers to shoot for if you are trying to optimize your driver distance:
Club Speed Ball Speed Smash Factor Attack Angle Spin Rate Dynamic Loft
80 119 1.49 3.0 3,000 16.5
90 134 1.49 3.0 2,700 15.0
100 149 1.49 3.0 2,500 13.5
110 164 1.49 3.0 2,100 12.0
If you REALLY want to dive into the technical details, go through the TrackMan University tutorials at www.trackmanuniversity.com. Very useful and informative stuff from the masters of TrackMan!
Schedule Your Driver Fitting Today!
Dan Sueltz


